![All American Logo_White-1.png]](https://knowledge.aaprintsupplyco.com/hs-fs/hubfs/All%20American%20Logo_White-1.png?height=50&name=All%20American%20Logo_White-1.png)
*IMPORTANT* Make sure to avoid getting the Head Cable or the Head Cable Connector wet with ink during the damper replacement process
- Power off the Printer by pressing the power button.
- Unplug the Printer power cable.
- Press the power button once again to the On position to drain any remaining power.
- Press the power button onto the Off position.
- Manually move the printhead to the to the middle of the track.
- Remove the clear printhead cover from the printhead.
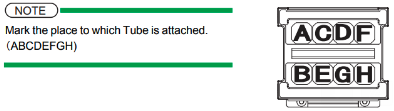
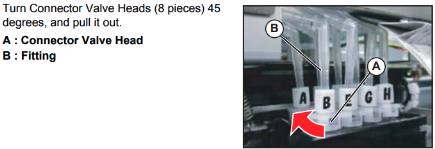
- Mark each tube so you won’t interchange any when you re-connect the tubes.
- Remove all connector tubes and seal them with plastic to prevent spilling any ink.
- Once removed, please all tubes to the left side of the printhead.
- Remove the printhead cover by unclipping the lock on each side.
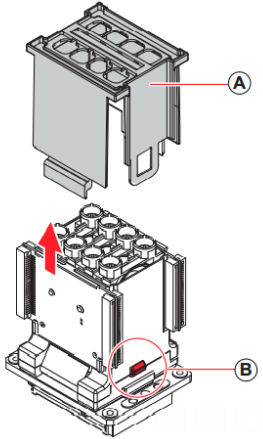
- After removing the cover, pull the damper of desired ink color and replace it.
- Perform steps 1 through 10 in reverse order.
- Re-check all connections and tubes before powering back on.
- After powering up the Printer, perform a long cleaning to charge the ink back to the color of the replaced damper.